Olan Suddeth
Dad. Computer geek.Homebrewer. Disney nut.
Would-be crafty guy.

Amazon
Save Money
Ibotta
Fetch Rewards
(use code "116YB")


Babies spit up. This is a fact of life as inevitable as death and taxes. Obviously, most of us would prefer that the freshly regurgitated stomach contents of our precious little ones to NOT go directly onto our clothing, hence the creation of the burp cloth.
While you can of course use a tee shirt, towel, or receiving blanket for the job, it's always nice to have a tool specifically designed for a given task, and burp cloths are no exception to that rule. Naturally, there are many places that you can purchase attractive burp cloths, but you can make them yourself for less than two dollars apiece with even the most novice level sewing skills. Since baby number nine will be here in less than a month, I have started making some of these to prepare for her; read on to see how it works.

The needed supplies are very simple.
All you need, supply wise, is a plain white cloth diaper and some scrap fabric. Cloth diapers come in packs of ten for just over a dollar each. I used fat quarters of cotton fabric for my burp cloths; these cost a dollar or less, and can be found at any craft or fabric store; these came from the fabric department of my local Wal Mart. With that said, feel free to raid your scrap bag or scrap drawer, as any piece that is large enough will do.
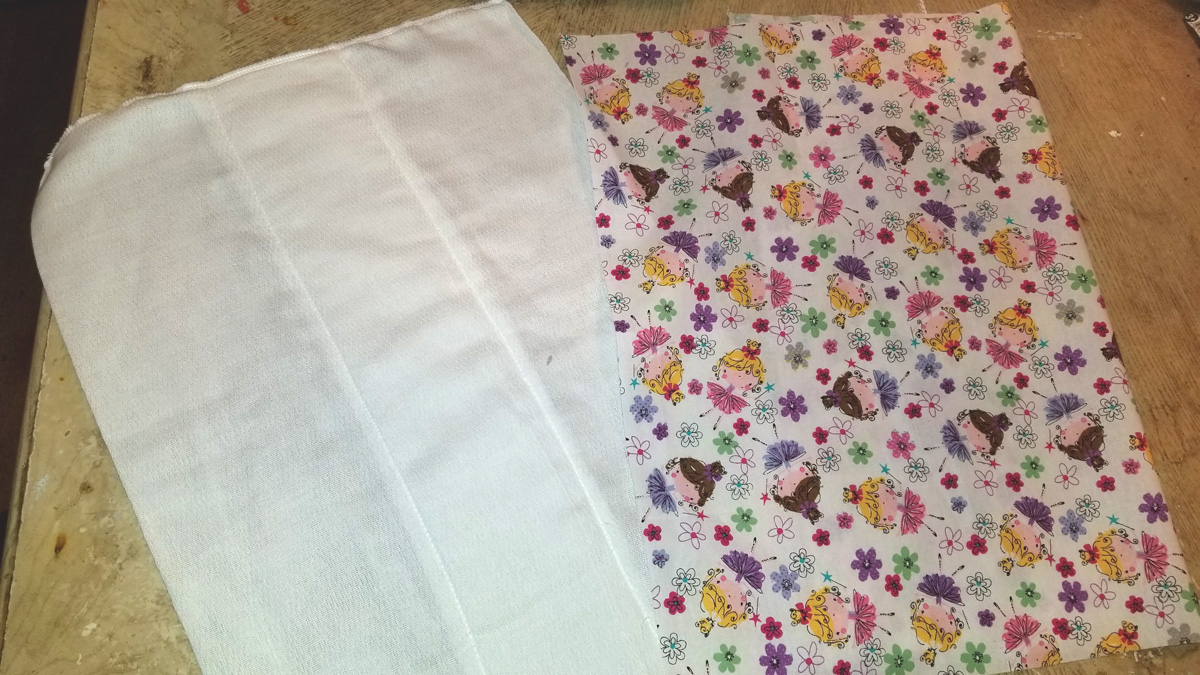
Before you start, go ahead and iron your cloth diaper and your burp cloth.

Fabric, ready to cut.
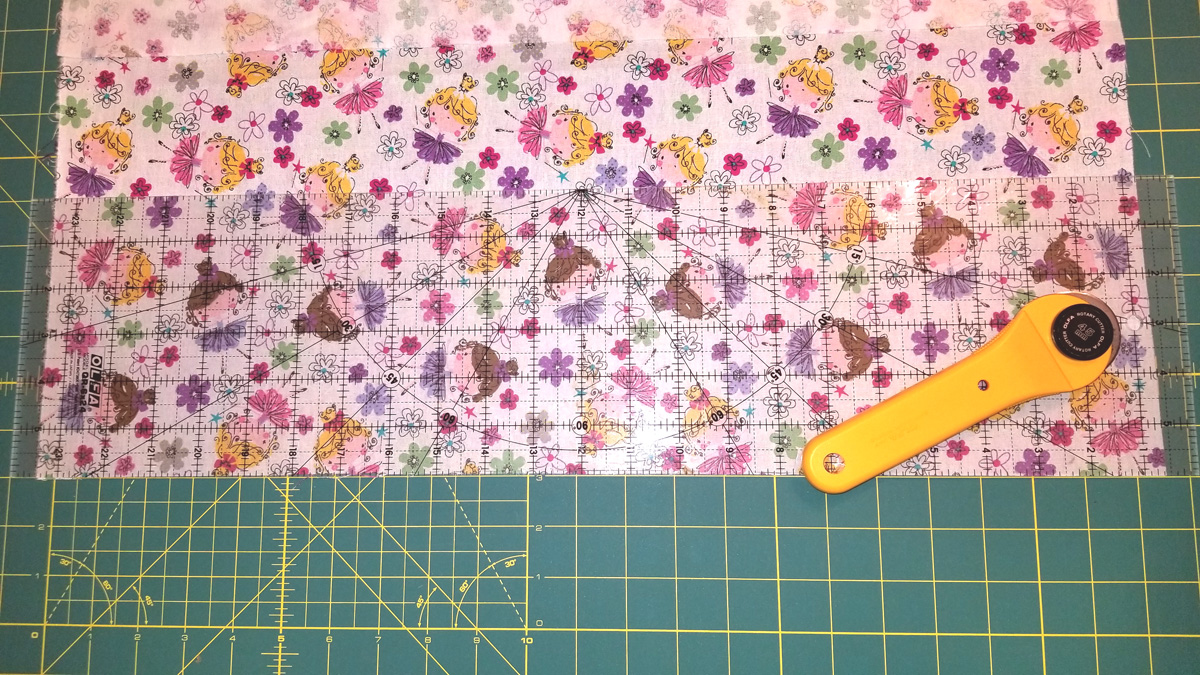
You're going to want to cut a strip that is roughly six inches wide by at least the length of the diaper. I personally leave mine the full length of the fat quarter; I find it far easier to just wrap the ends around as opposed to lining the fabric up on the edges (cloth diapers are not known for their straight, square edges).
While you can obviously use scissors, as you can see above, I use my rotary cutter, self healing cutting mat, and sewing ruler. Once I started using a rotary cutter, I now want to throw rocks at my scissors. It is so much easier, and the cuts are so straight and precise!

Crease the back.
Next up, you'll want to turn your fabric with the "good" side down. Fold about a half inch flap of the long side over, and use your iron to crease it. Do the same for the other long side. Your strip is now effectively about five inches wide. Note that you don't have to get a precise flap - roughly half an inch is fine, and if it isn't absolutely perfectly straight... again, see my note about cloth diapers not being square. Remember, you are catching spit up here, not machining parts for the space shuttle.
Making these creased folds ensures a pretty edge when you sew the pieces together, and you won't have to worry about it fraying.

All pinned together.
Lay your cloth diaper out flat, then center your fabric over it, good side up. Ideally, you will cover your center (thick) panel on the cloth diaper. If your strip is longer than the diaper, just let the ends hang wild right now. Pin each side to the diaper, with pins evert three inches or so.

The back flap, pinned in place.
Flip the whole thing over, then fold your excess over and pin it down. If you have a ragged edge, you may want to fold it once, then fold it again to look nice. Once more, you don't have to be ultra precise; this is the back side of a burp cloth, after all.
I have trimmed my fabric to the exact length of the cloth diaper before, but I honestly, feel like this method is easier and looks better.
Now, sew your flaps down, using a quarter inch seam allowance. Flip everything back over to the "good" side, and sew all of the way around the perimeter, again using a quarter inch seam allowance. Voila, you are done.

Two completed burp cloths. They look pretty good, even if they were sewed by a dad on a tiny, beginner sewing machine with slightly crooked seams!
Seeing as how you can get two to three strips out of a fat quarter (depending on what kind of pattern repeat you have on the fabric), it's very easy to end up with a really attractive - and functional - burp cloth for under two dollar, and with a very small time investment. It goes without saying that these make excellent little gifts, too.
Tags for this post: Sewing
Permalink
Please share this post!


If you enjoy HomeBrew Dad, please support the site by using my Amazon affiliate link when doing any shopping there. All prices are exactly the same, but HomeBrew Dad will receive a commission on your purchases. Thanks!
